Wonderflex with Friendly Plastic FAQ - by Amethyst Angel
Originally Published Feb 2012
by Amethyst Angel
(This tutorial features Friendly Plastic, which is no longer available. We suggest using Deco Art if you are looking to recreate the effect)
Wonderflex is a thin plastic sheet with a layer of gauzelike fabric embedded into it. The plastic becomes malleable when heated - at which point it can be shaped with one's fingers or over a mold. I had read about this material online for quite a while and finally decided to order a sheet from the following website to see if it lived up to its hype.

Styrene is a cheaper material inch for inch, but there ARE some things wonderflex can do that styrene just can't. (Rounded surfaces, for instance. This was primarily what I had planned on using the wonderflex for when I ordered it.)
What follows is a picture tutorial detailing how I made a rounded shoulder pauldron using wonderflex, a paper mache mold, and a material called Friendly Plastic (which I'll talk about in more detail later.)
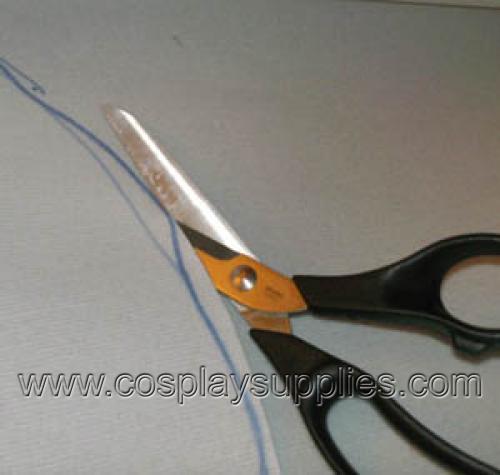
Step One for this project was to acquire a sheet of wonderflex (see above).
The first thing I did after acquiring the wonderflex, was to get my hands on a mold around which to shape it. I decided to custom-make one out of paper mache. (I could have used a rounded plastic bowl or some other round object for the mold, but I couldn't find any ready-made objects which were the exact shape I needed, so I had to create one.) To make my mold, I wetted newsprint strips with wallpaper paste and shaped them around a balloon. After applying several layers of newsprint and letting them dry, I varnished the mold so it would be strong and durable.

Lovely, isn't it? By the way, the object I'm trying to recreate is Cloud's Pauldron from Final Fantasy: Advent Children. Its surface, as you can see, is relatively smooth with a leathery texture to it. (We'll see how well I do in recreating it...)

The first thing I did with the mold was to take a marker and mark off the edges of the shoulder armor (ie: the parts of the mold that I wanted the wonderflex to cover.)

Now in my first attempt at shaping the wonderflex for this project, I cut off a large piece and then tried heating it with a blowdryer to shape it around the mold all at once. This did not work well, as there were too many wrinkles appearing in the surface. (I think if I were to practice enough, I could get to the point where I could melt and a spread a single piece of wonderflex over a large surface area, but for this project, I decided to hit upon a different solution, namely, to cut up the large sheet of wonderflex into a bunch of smaller pieces and apply those to the mold one by one.)
You can see already how the heat from my blowdryer has caused the wonderflex piece I cut out to conform to the shape of the mold. Once I had finished applying the heat, I smoothed out the surface of the plastic as best I could with my fingers.

I then cut out another small rounded piece of wonderflex and placed it next to the first, overlapping it slightly. (I made the pieces rounded because I thought that would help their edges to blend into each other better.)

Here you can see the placement of the wonderflex pieces. It looked a bit lumpy at this point in the process, but I decided to go on figuring I would find a way to smooth out the surface later.

One end of the shoulder pauldron (the end closest to the neck) had a raised lipped edge. I was able to recreate this by warming the wonderflex and holding it in place with my fingers until it cooled. (Note: wonderflex can get fairly hot when melted. You may want to don a pair of leather gloves before you begin heating it.)

After I had placed one coating of wonderflex onto the mold, I decided to place another coating over it for added strength (this involved cutting more rounded pieces and then applying them over what I had put down before.) As a result, you can see the surface of the pauldron is now lumpier than ever!

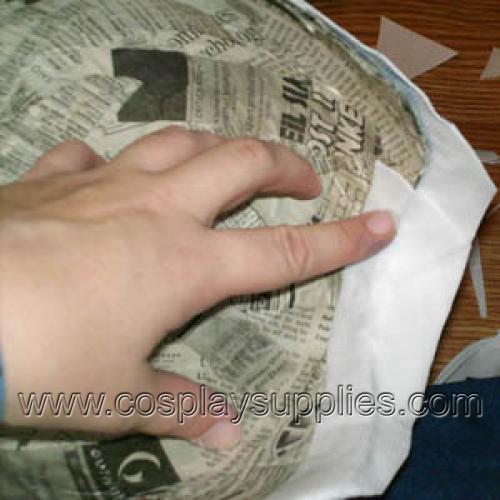
Once I had covered all of the areas that had needed covering, I re-traced the edges of my pauldron, inserted a scissors into the paper mache mold and started cutting. (I was unable to separate the wonderflex from the paper mache so I simply incorporated the paper mache into the project turning it into the lining for the pauldron.)

The plastic and paper mache were thin enough for me to be able to cut through both layers with a heavy scissors. I made sure to shape the edges of the pauldron as precisely as I could...

The next step was to take some scraps of wonderflex, (I had plenty lying around by this point,) heat them up and then press them into the interior of the pauldron, covering up the edges and seams where the paper mache and wonderflex met.
I made sure to go all around the edges of the pauldron with the wonderflex scraps, making them as clean and as smooth-looking as possible. Later on, after finishing construction of the pauldron, I would coat its interior with varnish and black acrylic paint to give it some durability.

Here is what I have at this point in the process: kind of a turtle-shell-looking thing with a lumpy surface. (Wonderflex has a gauzy texture thanks to the fabric it's embedded in. That and the lumps I made ensured that some way would have to be found to make the surface of this project appear smooth and armorlike.)

Cosplay Supplies Note: Amethyst's tutorial below references Friendly Plastic, which we no longer carry and is difficult to source. We suggest using Worbla Deco Art instead as it will act in the exact same manner but is lower cost and easier to find, available both on our website and in stores.
Enter: Friendly Plastic... What is Friendly Plastic? Well, it's pretty much the same thing as wonderflex, only it's not embedded in a gauzy fabric,-- instead, it comes in pellet form. You may have heard of colorful friendly plastic sticks (which could be heated and shaped into jewelry,) but for cosplay sculpting purposes, the pellets are far superior. Most craft stores that I know of stopped selling the sticks long ago, and the pellet form isn't sold at any brick-and-mortar store that I know of.

So you've gotten your hands on some Friendly Plastic. What do you do with it? Well, the first thing you do is get a pan (I recommend getting a junky old one from a thrift store) and fill it with water. Heat the water until it starts to simmer and then pour in a large spoonful of the Friendly Plastic Pellets.

After a few seconds, they'll start to melt and go clear. Once they're completely melted, use your spoon to stir them into a big gooey glob. (Alternately, you could just let the pellets sit and melt in the spoon--but only if you're not like me and therefore patient enough to stand over a stove holding a blazing hot spoon.)

Take the glob and spread the plastic a little bit with your fingers. The plastic will be hot, so you should take care not to burn yourself. (Friendly plastic will stick to certain types of fabrics and materials, so if you're going to wear protective gloves of any sort, you should test them first by pressing a tiny bit of the melted plastic to their surface .)

Spread the melty glob of friendly plastic over the surface of your armor, pressing it in with your fingers. Try to spread it over as large an area as possible. (Your primary goal is to cover the gauzy texture of the wonderflex. Don't worry about making everything perfectly smooth quite yet.)

Repeat the process, laying on more Friendly Plastic and blending it in with the plastic you've already applied. Do this until the entire surface area of the pauldron has been covered. The gauzy texture is mostly gone, but as you can see, those lumpy areas still remain (if anything, they've gotten worse.) So now you'll have to do something about them!

Take a large pot and fill it with water (there's no real danger that this one will get gummed up, since you won't be melting or stirring Friendly Plastic inside of it.) Make sure the pot you use is large enough to allow your entire shoulder pauldron to be dipped inside. Once the water inside the pot starts boiling, take your pauldron and set it into the hot water (taking care not to let any of the water run onto the paper mache lining.) Hold the pauldron in place for about 30 seconds or so.

Now comes the fun part - put the section of the pauldron that you just heated up onto a formica or metal countertop, put your hand into the pauldron itself, and press down hard, rocking the pauldron back and forth with a grinding motion until the surface grows cool.

If you do it right, you will see that the surface area that you heated and pressed will be much smoother than before. You'll have to continue this process, alternatively heating and pressing the surface of the pauldron until you've manage to smooth out the entire surface. It will take a lot of time, trial, and patience, (and quite a bit of elbow grease as well.)

This was what I had when the pressing and smoothing was finished. I did not smooth out the surface quite as much as I could have, because I wanted there to be some wrinkles and roughness in the texture of the pauldron. (It had to look like battle-worn leather, after all!)

When the pauldron had cooled completely, I brushed a coating of black glossy enamel paint over its surface. (I coated the interior of the pauldron with varnish and black acrylic paint at this time as well.)

Here's what it looked like after the first coating of paint. Already it's starting to look more like armor. I still had a long ways to go before it was finished, though!

Here's what the pauldron looked like after I dry-brushed its surface with a mixture of silver and black paint and glued a layer of braided trim along its bottom edge. (I also glued a cast resin wolf ornament to the front of the pauldron) You can see how rough-looking the pauldron's surface is. (This was intentional, of course - the dry brushing over the solid black really helped to bring out the texture.)

Here's another view of the pauldron. I will have to attach a leather strap to it before I can be worn. (I'm thinking of boring small holes into the bottom edge of the pauldron where I want the strap to go and then sewing the strap to it with a heavy needle and 4-ply black thread.)

I have heard that a common way of covering wonderflex is to use layers of acrylic gesso, (a white, paintlike substance that is often used by artists to prepare their canvasses for painting.) There's a problem with painting gesso over wonderflex however, --it tends to flake off when damaged. (Sometimes whole chunks can come off.) Some advantages that gesso DOES have is that it can be sanded--which is something you can't do with Friendly Plastic. And gesso is, of course, much less expensive than Friendly Plastic. Still, I personally think that the extra cost and the extra work involved with the use of Friendly Plastic make it well worth the investment.
Oh, I should mention that bondo is another material you can use to cover wonderflex with, but I swore off using that material long ago thanks to its weight and the fumes it gives off. Still, if you have any experience working with it or would like to experiment using it on wonderflex, go right ahead. Just make sure you take the proper safety precautions (use a respirator and gloves, etc.)
As far as wonderflex goes, I think it's worthwhile for those things which just can't be made using styrene. I've only just started experimenting with it and, no doubt, there's all sorts of things it can do that I haven't even thought of. The only way to really know how well it will work for you is to buy a sheet and start experimenting with it yourself. See the different ways that you can shape it and see what kinds of materials work best to cover it. (And share what you learn with other people. I'm sure they'll be interested in all the wonderful things you manage to do with it.)